

DIY Wooden Sign
I stumbled across a fun tutorial a while back and bookmarked it immediately. I have a habit of squirreling away DIY projects to work on when I have free time. Because, you know, I have SO much free time. *cough*
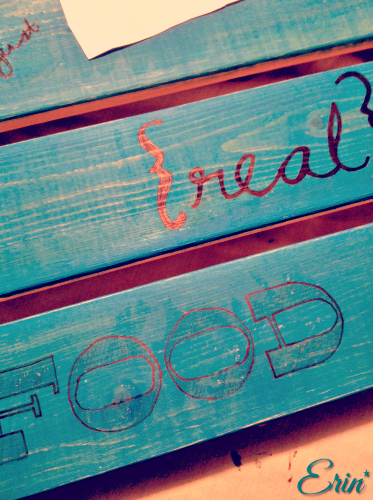
I had a single wooden pallet-style shelf that I bought {accidentally, at that} at Ikea years ago and decided to finally find a use for it. Of course, you could use any flat piece{s} of wood you happen have. I followed Diddle Dumpling‘s directions loosely, my main goal was getting a faint outline for words onto the wood.
On with the project!
Gather your tools:
- Wood
- Distressing tools, I just used an old emery nail file
- Acrylic Paint
- Paint brush{es}
- Permanent Marker
or paint pen {to fill in letters}
- Printer
- Fonts that you love
- Photoshop Elements or a similar program – the key here is the ability to flip the text
Start by prepping the wood. I took an old emery nail file to the boards. These files are great to re-purpose for crafts! This one gets a lot of use…

Then I applied a very light amount of paint. Not perfect, not at all saturated. It was a relatively dry application, starting in one corner and dragging as much as I could across the board. I only added more paint when needed. Then, I went at it again with the emery board. Wherever I felt like it. The whole process is simple and there are no rules with it – I think that’s why I loved this project so much!
While the wood dried, I got busy in Photoshop. Choose words in whatever font {I have a healthy adoration for fonts} – just make sure it will fit on your display. Obviously you can cut each and move them how you want them displayed on the board later.
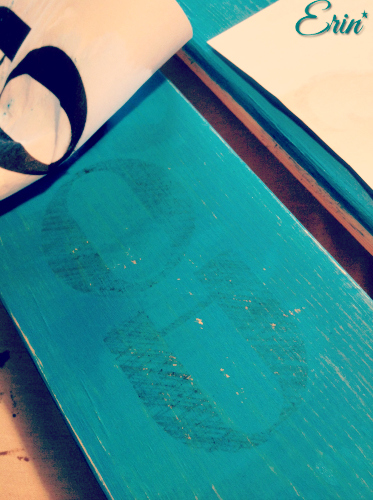
Once you have the words all ready, double check that the text layer is selected, and rotate the layer {this is so it is readable once the ink transfers}. In Photoshop Elements 11 that is done by selecting the following; Image < Rotate < Flip Horizontal – The end result will look like this…


What words, quote, or phrase would you use on your Wooden Sign?
This post contains Amazon associate links to products I used for this project.


17 Responses
Very cool! I haven’t tried any projects with my Silhouette yet where I needed to flip the text but I definitely want to try it out!
That is pretty awesome!! I’ll have to give that a try.
That’s so pretty! I always say I wish I was crafty enough to do things like this, but I think I just might be able to handle this one!
Oh, I like that! I’d put Live Well. Laugh Often. Love Much. on mine. 🙂
That’d be a fantastic quote!
Wicked-cute, and really simple! Despite the fact that I am a DDIY’er . . . Don’t Do It Yourself’er . . . I think I might give this a try. I have a few pallets that I bought for another project that we don’t have a need for any more and this would be a great way to use them!
Oh I love that – so simple when you know how!
This is a wonderful diy project. I’ve been wanting something very similar for my kitchen!
Love wooden signs. I have never tried making one on my own, but you make it look so easy. Love the one you made!
This turned out really cute!
I love this DIY project. My sign would say, proceed with caution…
I like wooden signs too… I would like one with my last name on it
My wife does something similar with wooden crate pieces. She paints them and we have a few around the house.
This turned out really nice. Thanks for the tips! I have a doll cradle that I want to put my daughter’s name on, and it seems like it should be the same process.
neat project.i probably dont have software like that.even if i did i probably wouldnt know how to use it..lol.but i do like the quote live well,laugh often
Looks great and you are very crafty! I would use “Some is better than none”
I LOVE this! Using Photoshop to print out your word design as a traceable template makes it so much customizable. My head is spinning with font and object art ideas to use with this!