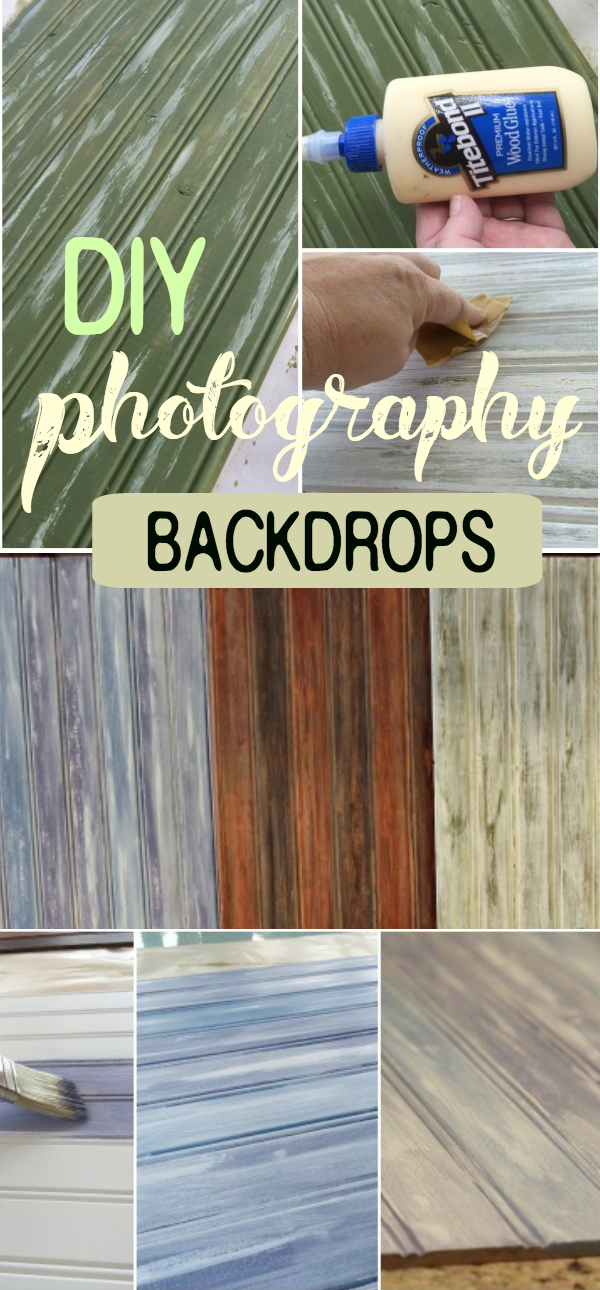
If you have searched online for the fake wood vinyl backdrops for food photography, you have probably noticed how expensive they are! I sure did and I decided to try making my own photo backgrounds that look like aged wood. Not only were they really fun to make, but they turned out really good!
Making homemade wooden backgrounds for photography has become a new hobby of mine

How do you make photography backdrops look like faux wood?
I’m sure there are many different techniques, but the one I describe below is my favorite.
I use Bead board in (pine), as I find that it gives me the best results. Using this wood makes it easy to apply any color I like for the finished product, and it makes my homemade photo backdrops look like real wood!

How to make wood look like it has cracked paint
Absolutely. When I use paint and sandpaper to make bead board look like aged wood, it is so fun, and definitely my favorite thing to do when I am making my DIY photo backdrops! I get to be creative, and every project turns out a little differently. It’s always exciting to see what the finished product will look like.
Another thing that I love about making photography backdrops yourself is that since they are inexpensive and you can have many more color choices than if you were to buy them (well for most of us I would imagine!). You can make DIY backdrops in various colors, patterns, and sizes. You might have a certain photography setup that requires a certain size “table” or background”. Just cut this to size. The best part? you don’t have to worry about bubbles, or it rolling up like you do with the vinyl backdrops! Let’s get to it!
Easy DIY Faux Wood Photography Backdrop Tutorial
Supplies
Sample paints (available at Lowe’s, Home Depot, etc.).
Valspar samples:
*Ultra White
*Jungle Thicket
*Merlin
*Delightful Moon

Acrylic paint (small bottles or tubes):
*French Blue
*Burnt Sienna
*Burnt Umber
Wainscoat Plank Paneling (Bead Boards) – White
Wainscoat Plank Paneling (Center Boards) – Pine, Natural
Wood Glue
1 1/2″ or 2″ Paintbrush
Sand paper
DIY Food photography backdrops!
First you will need to glue your boards together (you can make them any size you want!). Since these are tongue and groove boards, I first connected them to make sure they were a good fit. I ran a line of wood glue on the “groove” side of the board and then inserted the “tongue” board and pressed them together.
Brown backdrop
I used two white bead boards and glued them together. I would recommend gluing 3 together though, as mine were a little narrow.
After the boards have been glued together, I lightly and randomly brushed wood glue on top of the boards, then gently wiped a bit with paper towel.

Apply Burnt Sienna and Burnt Umber Acrylic paints (you can find these at any craft store) on alternating boards. After the paint has dried, sand the boards a bit. Next you will make a white wash. Mix approximately 1/3 paint to 2/3rds of water. Using a regular paintbrush, brush the white wash over the entire board. Wait 3 minutes and wipe down with a paper towel.

Green backdrop
Glue together four wooden bead boards, then paint them green (using Valspar Jungle Thicket). After the paint has dried, gently swipe wood glue in long strokes, on top of the board, straight from the bottle. Gently wipe (to flatten glue) with a paper towel. Paint the entire board with white paint and let dry thoroughly. Sand carefully, exposing some of the natural wood on the edges of the boards, and over the dried glue. This will look like wood grain if done correctly. Touch up creases with white paint as needed.

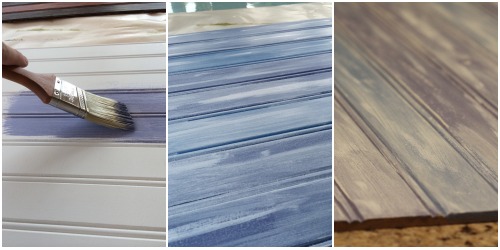
Blue backdrop
To make the blue backdrop, use two or three white bead boards (glued together). Next you will paint the board. You can either do one solid color, or alternate colors (I wanted to mix things up a bit with this backdrop, so I painted two strips with the Valspar “Merlin” paint, and then the next strip with acrylic “French Blue”). Continue the pattern with the Merlin and French Blue paints (or other colors of your choosing). Use a paper towel to lightly apply white paint over the whole board. Using a skinny (small kids brush) paintbrush, brush small, random lines/stripes. After the paint dries, sand the whole board – lightly in some places and a little harder in others.

After your boards are complete, flip them over and run a line of wood glue down the back seam for added strength.
You can change the effect of your boards by sanding more or less, depending on if you want the original “natural” color to show through some.
You can use whatever colors you like and just experiment. I had a blast doing these and can’t wait to make more!

Stay tuned for my next DIY photography backdrops post – I have some other fun ideas!

Stephanie
I love how these turned out! Was this project expensive (the paneling especially)?
Jennifer-admin
Not very expensive! The boards were about $12 per pack, and I could make 2 or 3 backdrops out of each. The sample paints were a little over $2 each, and I already had paint brushes.
Erin
Nicely done!
Jennifer-admin
Thank you, my friend!
Katy
Great idea. I actually have some free paint “samples” from coupons I got out of a magazine. Thanks for the inspiration.
Jennifer-admin
Oh that’s a great idea! And you are very welcome!
April @ The Steadfast Reader
How crafty! I think you’re right that a proper backdrop can make all the difference in the world on a great picture.
Thanks for linking up!
Virginia
Great backdrops! I don’t take food photos but this would also be great for craft pictures. Thanks for the tutorial.
Jennifer-admin
You are most welcome! They would definitely work for craft photos as well as many other things!
Dee
I’ve been meaning to try something like this, and love the way yours turned out! Thanks for the great tutorial. 🙂
Carrie
LOVE this! And can’t wait to see what else you come up with. I hate taking food photos – but I love it when they’re all edited and pretty, and these are gorgeous backdrops that even *I* could make.
Thanks for linking up to Wordy Wednesday. Pinning and stumbling this!
Alison
What an amazing and easy way to make backdrops!